You know me, always trying to keep it simple and always tying to think of ways to use my stamps other than with just paper and ink. In other words....get more bang for you buck!
I was looking at my lovely {ippity} stamp collection and started looking at the stamps individually, instead of as sets (although.....I ended up using most of the stamps from 1 set, LOL!). There are soooo many that can be used to create custom embellishments. It's so easy and seriously, any part of a stamp can work-dots, little flourishes, text, flowers....you name it, you can use it.
I have a love affair with many crafty, stampy things, BUT buttons are at the top of my list! LOOOVE me some buttons. I love that I have a button die, so now I can make buttons of all kinds and when I pair them with my stamps, the possibilites are even MORE endless! So today, I'll show you how to make some custom, {ippity} buttons and I even throw in a custom paper flower! Custom embellishements are what we're doing today.
The quick tutorial today also shows how quickly you can alter any notebook.
Here's what you'll need:
chipboard (I used coasters today)
random ippity stamps
button die (or circle punch and a hole punch)
paper flower
notebook
paper
ink
Step 1. die cut some buttons with a die (I used MFT Button Quartet) from chipboard or cs. I like chipboard because it gives the buttons some thickness and a more authentic look. If you don't have a button die, just punch some different sized circles and add button holes with a small hole punch. Eyrn did up a fun tutorial waaaay back. I'll have to see if I can find it.
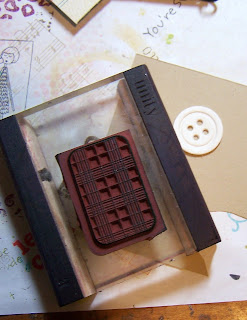
Step 2. stamp directly over top of the button. Repeat for each button you have die-cut. I changed ink color and stamps for each one.
Step 3. Find a text stamp image and stamp directly onto your paper flower.
Step 4. Complete your custom embellishments. I like to dress my buttons with twine, it just helps give them a more completed look.
Step 5. Stamp sentiment and any accent images to designer paper and then attach finished, custom embellishments. Add finished layer to notebook with Scor-tape or other strong adhesive. And DONE! You have a sweet little notebook to dress up any desk top or counter space. I gave this one to my Mom. She made a surprise visit this week and I was able to complete this while she played with the boys. Plus, she thinks everything I make is wonderful! Aren't mom's great?!!!

Thanks for stopping by! Don't forget today is hip hop day. The Unity DT has LOTS of eye candy for you.


Love your decorated buttons! I have a sizzlit die that I will try this on! Love the finished book cover! Thanks for sharing!
ReplyDeleteLOVE this Lisa what a great idea!!!!
ReplyDeleteLisa, girlie, this is such a GORGEOUS notebook and those buttons are the sweetest! I am so on a custom made button kick lately!
ReplyDeletelove the idea of stamping the text on the flower...I have that stamp and will have to try it. So neat because you can customize to match with ink of your choice. Love it!
ReplyDeletewow just to cute, thanks for the tips.
ReplyDeleteLOVE LOVE LOVE this! I love that I'm not the only one who stamps on buttons! LOVE this altered notebook:)
ReplyDeleteVery clever idea! Love it!
ReplyDelete